
Kia Telluride: Maintenance / Wiper blades
Blade inspection
Buildup of road film, dead insects, tree sap, or leftover car wash wax treatments on either the windshield surface or rubber wiper blades can compromise clearing efficiency and cause annoying streaking. If the wipers fail to wipe smoothly across the glass, clean both the glass panel and the flexible blade elements thoroughly using a quality automotive glass cleaner or mild soap solution, then rinse completely with clean water.
NOTE
To avoid degrading or hardening the flexible rubber squeegee elements on your Kia Telluride, never apply gasoline, kerosene, paint thinners, harsh solvents, or petroleum-based liquids on or near the wiper blades.
TIP
Commercial hot waxes and gloss enhancers applied during automated car washes frequently deposit an invisible chemical film that makes windshield glass difficult to wipe clean without streaking.
Blade replacement
When windshield wipers leave persistent streaks, skip across the glass surface, or no longer clear heavy rain adequately, the rubber squeegee blades may be dry-rotted, split, or worn out and require immediate replacement.
WARNING
-
Never force or bend the wiper arms manually across the windshield surface, as doing so can damage internal linkage mechanisms or distort the arm tension springs.
-
The use of incorrect, non-specified wiper blade replacement sizes or improper mounting adapters can lead to poor blade contact, windshield scratching, or complete wiper system failure during heavy rain.
Front wiper blade replacement
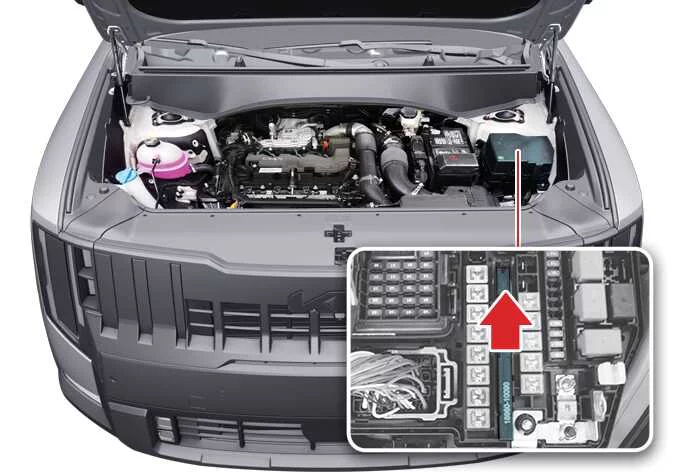
|
For ease of access and to prevent the wiper arm from striking the trailing edge of the hood, place the front wipers into the service position before servicing. Within 20 seconds after turning off the vehicle ignition, move the wiper control lever up to the single wiping (MIST) position and hold it firmly for more than 2 seconds until both wiper arms extend vertically into their upright position on the glass.
NOTE
Wiper arms
-
Never allow a bare, spring-loaded metal wiper arm to snap down against the windshield while the blade is removed, as the direct impact will easily crack or shatter the glass.
-
Do not attempt to forcibly pull or pivot the wiper arm forward while it rests in its parked position beneath the hood line, as the metal arm will chip the painted edge of the hood.
- Carefully lift the extended wiper arm away from the glass and pivot the wiper blade frame horizontally to reveal the mounting lock clip.
-
While depressing the locking tab clip, slide the wiper blade downward toward the base of the arm to unhook and remove the blade assembly from the metal Wiper arm hook.
-
Slide the new wiper blade assembly onto the arm adapter hook until you hear an audible click signaling proper engagement, working in the reverse order of removal.
- Verify that both replacement blade assemblies are fully locked by gently tugging on each frame structure.
- Gently lower the assembled wiper arms back onto the windshield glass surface.
- Turn the ignition key or Start button to the ON position to automatically return the wiper system to its normal resting position at the base of the windshield.
Rear wiper blade replacement
|
|
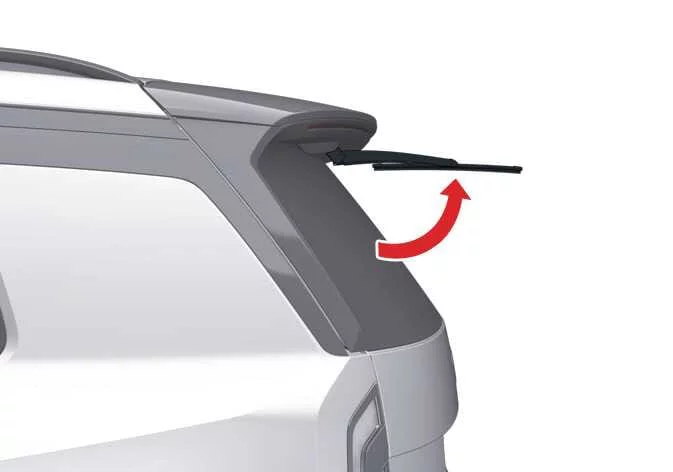
- Turn off the vehicle ignition, then immediately push and hold the wiper control lever up to the single wiping (MIST) position within 20 seconds. Keep holding the switch firmly for more than 2 seconds until the rear wiper arm swings outward and stops at its bottom-center service orientation on the glass.
-
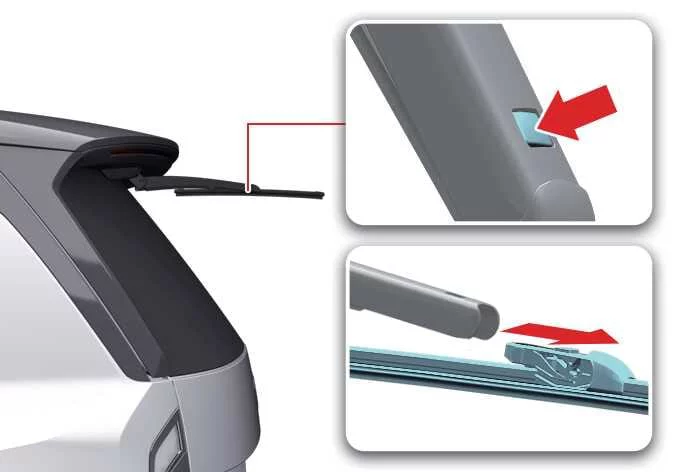
Carefully raise the rear wiper arm away from the rear windshield and locate the release tab or locking slot on the center frame.
-
While applying steady pressure to the locking clip, pull the wiper blade firmly outward to disconnect it from the wiper arm pivot pin.
- Align the central mounting channel of the fresh replacement blade with the arm hook, pressing it squarely into the slot until an audible click confirms proper engagement.
-
Verify that the new blade structure is firmly locked onto the arm by giving it a light tug in both directions before returning it to the glass.
Fold the wiper arm back down onto the rear glass surface, turn the ignition switch to the ON position, and test the rear wiper function through one complete cycle to ensure smooth sweep motion without binding.
If you encounter difficulty or wish to prevent accidental damage to the wiper linkage or liftgate finish, have the replacement performed by an authorized Kia dealer service technician.
TIP
-
The rear wiper mechanism may briefly pause or fail to operate for roughly 10 seconds if activated without sufficient washer fluid or when the rubber squeegee is frozen directly to the glass. This momentary delay is a built-in safety protection feature driven by the motor overload circuit to shield the electrical components from thermal damage.
-
Periodically lift the wiper arms to thoroughly wash the rear windshield glass with clean automotive soap and water, drying it afterwards with a lint-free towel. Remove any oily road film, wax residue, or tree sap from the flexible rubber blades using a mild wiping solution to prevent squeaking and streaking.
NOTE
Avoid applying excessive twisting or pulling force directly to the plastic wiper arm or central connector clip during blade removal, as excessive force can crack the mounting frame or misalign the arm spring tension.
-
 Climate control air filter. Inspecting the climate control air filter
Inspecting the climate control air filter Replace the climate control air filter according to the factory maintenance schedule to maintain proper cabin ventilation and air quality...

Other information:
Kia Telluride (LQ2, 2027-2026) Owner's Manual: To stay in N (Neutral) when engine is OFF
If you need the Kia Telluride to remain in N (Neutral) after switching the engine off while the ignition is in the ACC position, follow the procedure below: Turn AUTO HOLD off and release the parking brake while the vehicle is in the ON position.
Kia Telluride (LQ2, 2027-2026) Owner's Manual: Seat belt - Driver's 3-point system with emergency locking retractor
Buckling your seat belt To fasten the seat belt in your Kia Telluride, slowly pull the belt from the retractor and insert the metal latch plate (1) into the buckle (2). A distinct "click" confirms that the latch has engaged correctly.